Yoga Poses with Names and Pictures
Yoga has gained popularity due to its numerous health benefits, including improved flexibility, balance, and reduced stress. However, many people struggle with the Sanskrit names of yoga poses. This ultimate guide will provide a comprehensive list of 10 yoga poses with names and pictures to help you master your practice.
Mountain Pose (Tadasana)
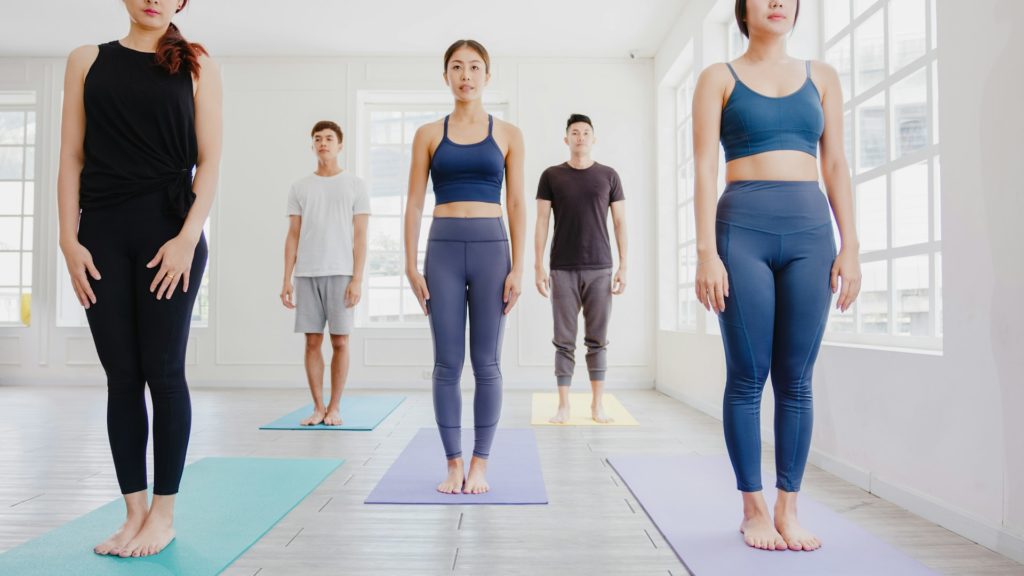
The Mountain Pose is a physical posture and a powerful mental and spiritual practice. It promotes balance, stability, and an improved sense of posture. By aligning your body and bringing your attention to the present moment, you can cultivate a state of harmony and tranquility.
The Mountain Pose teaches us the art of stillness, helping us find our center amidst the chaos of life.
When practicing the Mountain Pose, imagine yourself as a tall, majestic mountain rooted deep into the earth. Embrace the stillness and strength that this pose embodies. Standing tall like a mountain can enhance balance, focus, and well-being.
Chair Pose (Utkatasana)
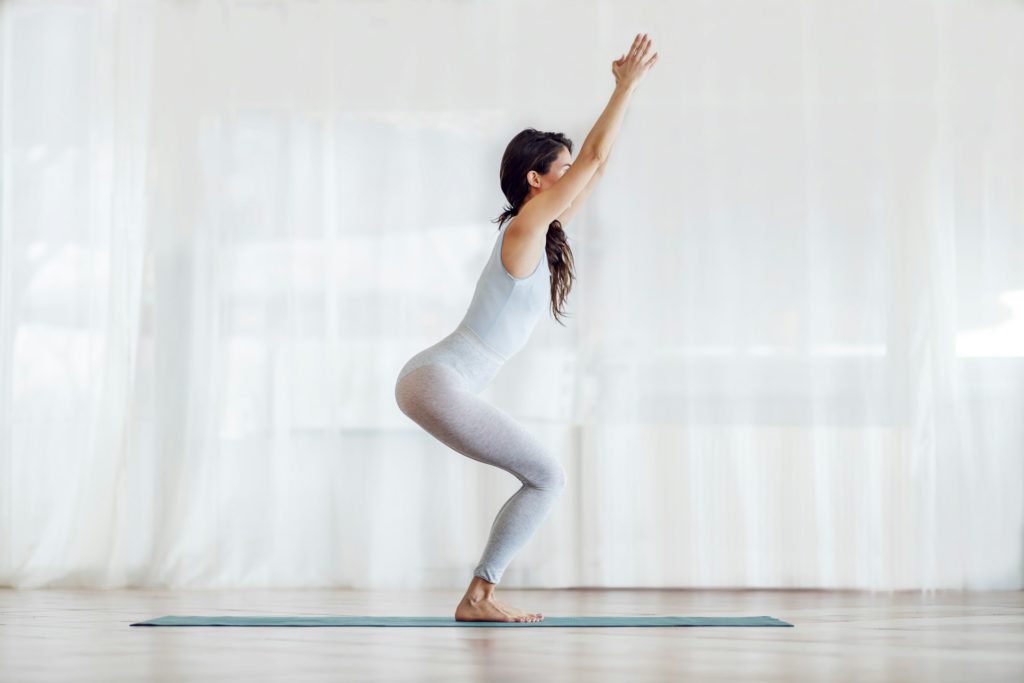
To practice Chair Pose, begin in Mountain Pose with your feet hip-width apart and your hands at your sides.
As you inhale, raise your arms overhead, reaching toward the ceiling. Keep your shoulders relaxed and aligned with your ears.
Now, as you exhale, sit back as if you’re lowering yourself into an imaginary chair. Keep your weight in your heels and your knees behind your toes.
Engage your thighs and draw your tailbone down towards the floor to create length in your spine. Keep your chest lifted and your shoulder blades drawn together to activate the upper back muscles.
Hold the pose for several breaths, maintaining a steady and even breath. If you’re new to Chair Pose, start with shorter holds and gradually increase the duration as you build strength.
To exit the pose, inhale as you straighten your legs and return to Mountain Pose with your arms at your sides.
Chair Pose is a fantastic yoga pose for leg strength. It activates and tones the quadriceps, hamstrings, and glutes. It also improves balance, coordination, and stability throughout the body.
Embrace the challenges of Chair Pose and feel the strength and power within you as you practice this invigorating yoga pose.
Tips for Enhancing Your Chair Pose
- Keep your knees aligned with your ankles to avoid strain on the knees.
- Engage your core muscles to maintain stability and support your lower back.
- Focus on your breath to stay present and centered in the pose.
- If your shoulders are tight, try interlacing your fingers behind your back and opening your chest to deepen the stretch.
Variations of Chair Pose
Several variations of Chair Pose can add diversity to your practice and target different muscle groups:
- Twisted Chair Pose (Parivrtta Utkatasana): This variation involves twisting the torso while in the chair position, providing a deeper stretch for the spine and chest.
- Eagle Pose (Garudasana): In this variation, you wrap one leg around the other and bring your arms into an intertwined position. This pose challenges your balance and strengthens your legs and arms.
Chair Pose Precautions
While Chair Pose is generally safe for most people, it’s essential to take precautions if you have any existing knee, hip, or lower back injuries. If you experience pain or discomfort in these areas during the pose, modify or avoid it altogether.
Chair Pose Benefits
Chair Pose offers a range of benefits for both the body and mind:
|
Body Benefits |
Mind Benefits |
|---|---|
| Strengthens the legs, glutes, and quadriceps. | Builds mental focus and concentration. |
| Tones the upper back, shoulders, and core. | Improves balance and stability. |
| Stretches the chest and shoulders. | Boosts energy levels. |
| Increases flexibility in the ankles and calves. | Builds self-confidence and inner strength. |
Now that you understand the technique and benefits of Chair Pose incorporate it into your regular yoga practice. Challenge yourself, embrace the burn in your legs, and appreciate the strength and resilience you cultivate through this empowering yoga pose.
Downward-Facing Dog (Uttana shishosana)
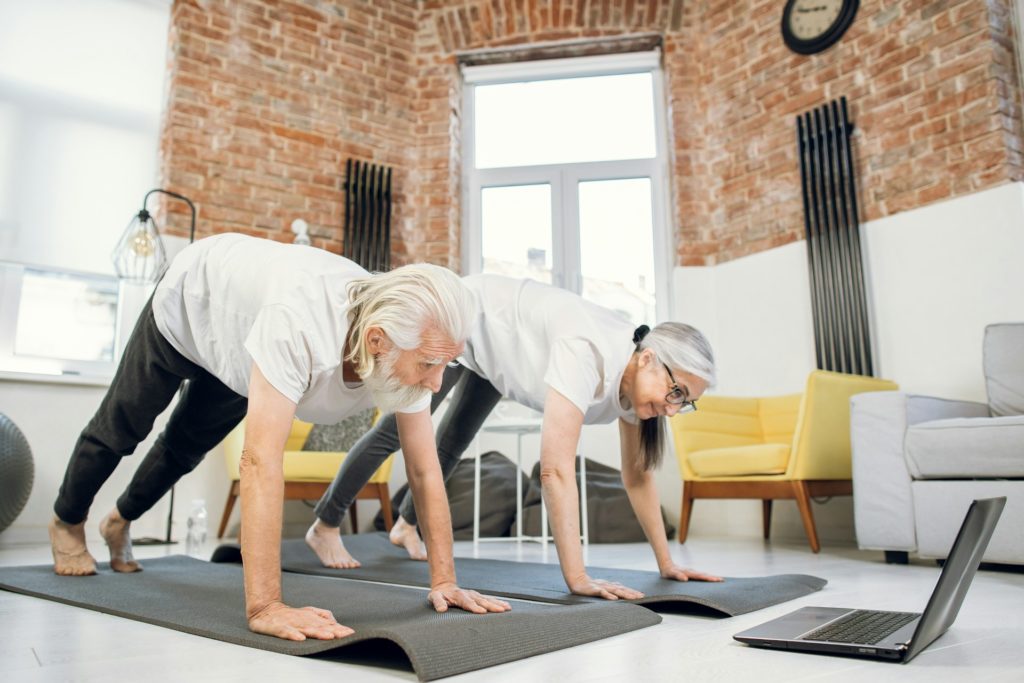
That’s where the modified version of this pose, Downward-Facing Dog on a Chair (Uttana shishosana), comes in. This modified yoga pose provides the same benefits as the classic pose while reducing the weight on your upper body, making it more accessible for beginners.
To do Downward-Facing Dog on a Chair, follow these steps:
- Place a sturdy chair against a wall, with the backrest facing you.
- Stand facing the chair a few feet away.
- Place your hands on the backrest of the chair, shoulder-distance apart.
- Step your feet back, creating a right angle with your body and the floor.
- Keep your hands firmly on the chair and arms straight.
- Press your chest towards your thighs and lengthen your spine.
- Engage your core and breathe deeply in this position.
Performing Downward-Facing Dog on a Chair allows you to focus on stretching the hamstrings, opening the shoulders, and elongating the spine without placing excessive weight on your upper body. This modified pose is an excellent option for beginners or those with limited upper body strength who want to experience the benefits of Downward-Facing Dog.
Warrior II (Virabhadrasana II)
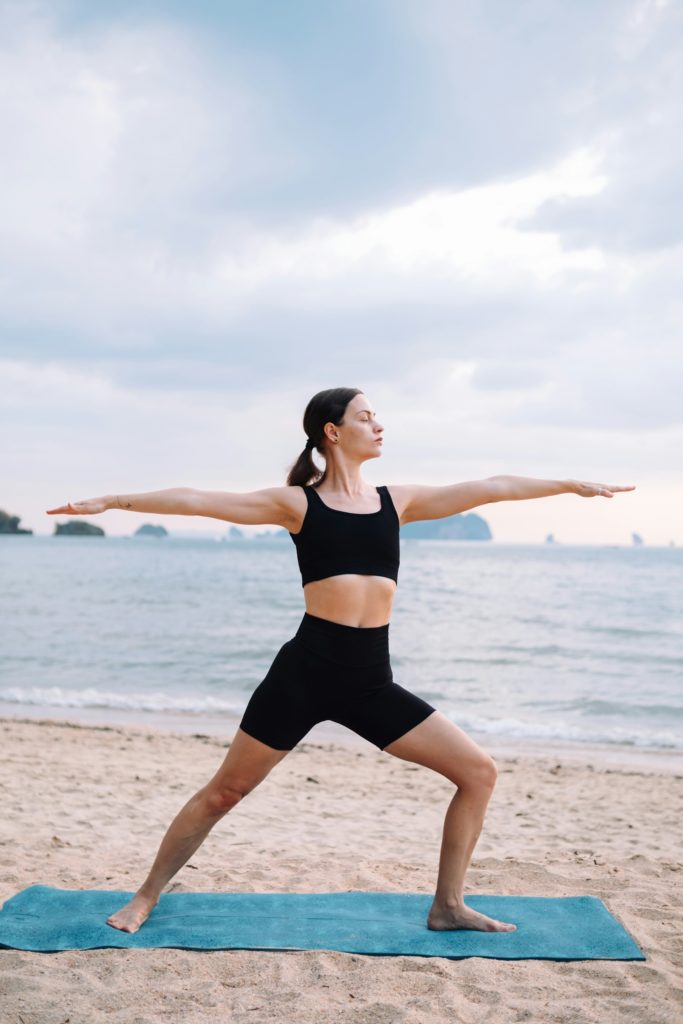
Warrior II, or Virabhadrasana II, is a standing pose that increases stamina, strengthens the legs, and promotes mental focus. To practice this pose,
follow these steps:
- Start with your feet wide apart.
- Turn your left foot out 90 degrees while bending your left knee to a 90-degree angle.
- Extend your arms to the sides at shoulder height.
- Gaze over your front fingertips.
This powerful pose calms the mind and improves balance, stability, and leg strength. It engages the entire body and helps you cultivate strength and focus on and off the mat. As you settle into this pose, feel the ground beneath your feet and the energy flowing through your body.
| Benefits of Warrior II (Virabhadrasana II) | How to perform Warrior II (Virabhadrasana II) |
|---|---|
|
|
Triangle Pose (Trikonasana)
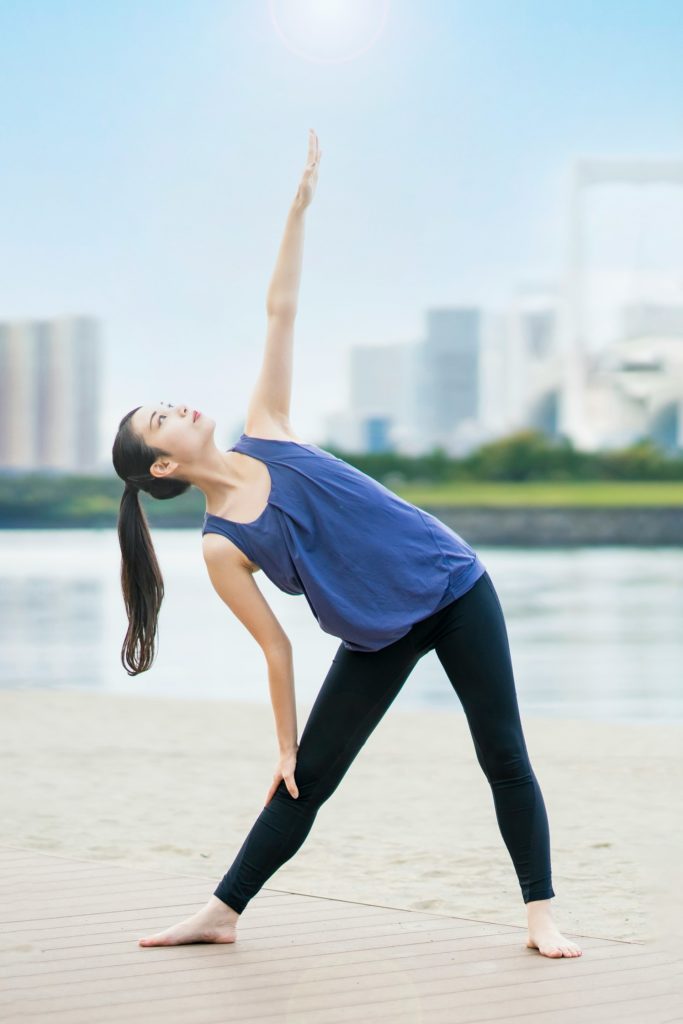
Triangle Pose, or Trikonasana, is a standing pose that stretches and opens the hips, hamstrings, and inner thighs. Begin with your feet wide apart, turn your left foot out 90 degrees, and reach forward with your front arm while hinging at the hip. Bring your front arm down to your shin, a block, or the ground, and lift your back arm toward the sky. This pose improves balance, promotes expansion in the body, and stretches multiple muscle groups.
Triangle Pose Instructions:
To practice the Triangle Pose, follow these steps:
- Stand with your feet wide apart, about 3-4 feet.
- Turn your left foot out 90 degrees to point to the left side.
- Extend your arms out to the sides, parallel to the floor.
- As you exhale, reach your left arm forward and hinge at the hip.
- Place your left hand on your shin, a block, or the ground.
- Extend your right arm toward the sky, palm facing forward.
- Gaze up toward your right hand.
- Hold the pose for several breaths, then switch sides.
| Benefits of Triangle Pose: | Precautions: |
|---|---|
|
|
Variations of Triangle Pose:
Here are a few variations of Triangle Pose that you can explore:
Revolved Triangle Pose (Parivrtta Trikonasana): In this variation, you twist your torso and reach the opposite arm toward the sky, deepening the stretch and adding a twist to the spine.
Extended Triangle Pose (Utthita Trikonasana): This variation involves extending the top arm directly overhead instead of reaching it toward the sky, creating a longer line from the fingertips to the extended leg.
Supported Triangle Pose: Using props, such as a block or a chair, can provide additional support and stability as you explore the pose and gradually build strength and flexibility.
Incorporating Triangle Pose into your yoga practice can enhance your balance, increase flexibility, and experience a deep stretch in the hips and hamstrings. Remember to practice with proper alignment, listen to your body, and modify or skip any poses that don’t feel right.
Tree Pose (Vrksasana)
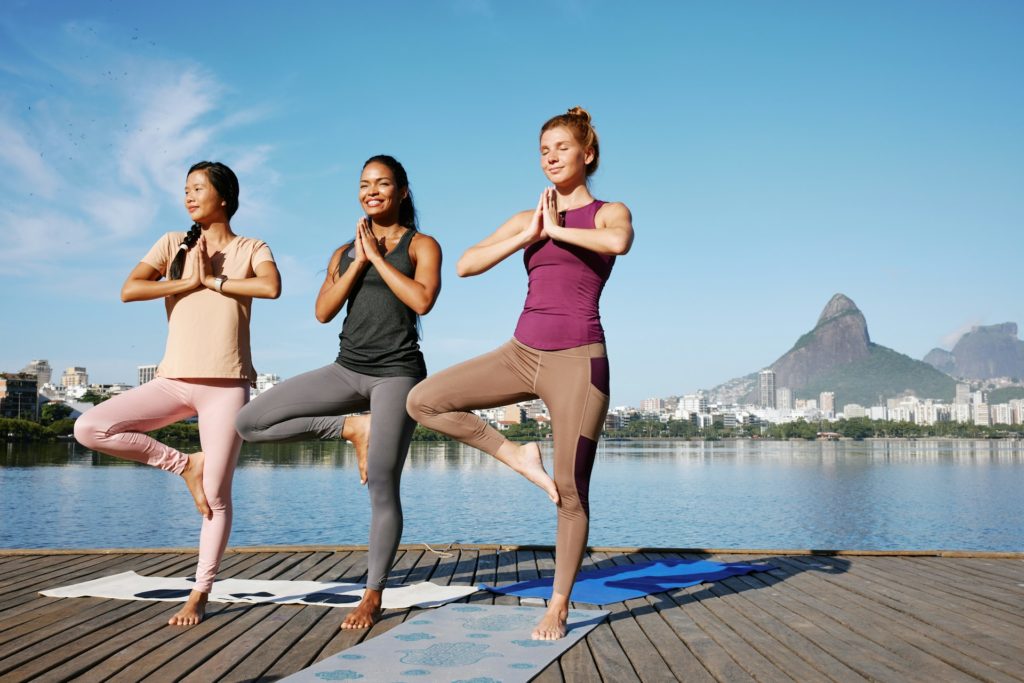
Tree Pose, or Vrksasana, is a standing pose that improves concentration and balance by strengthening the arches of the feet and the outer hips. Start in Mountain Pose and shift your weight onto your left foot. Lift your right foot and place it on your inner left thigh or calf, avoiding the knee. Bring your palms to touch in front of your sternum and find a fixed point to gaze at for additional balance. This pose helps develop stability and focus.
- Begin in Mountain Pose, with your feet hip-width apart and your arms at your sides.
- Shift your weight onto your left foot, grounding firmly through all four corners of the foot.
- Bend your right knee and place the sole of your right foot on your inner left thigh or calf. Avoid placing it on the knee.
- Bring your palms together in front of your chest in a prayer position.
- Find a fixed point to gaze at to help you maintain your balance.
- Hold the pose for several breaths, feeling the strength and stability in your standing leg.
- Repeat on the other side, switching the placement of your feet.
Tree Pose (Vrksasana) is a beautiful yoga pose that improves balance and concentration. It can strengthen your legs, increase focus, and cultivate a sense of inner stability. Listen to your body and modify the pose to suit your flexibility and comfort level.
| Benefits of Tree Pose: | Instructions: |
|---|---|
| Improves balance and stability. | Start in Mountain Pose. |
| Strengthens the arches of the feet and outer hips. | Shift your weight onto your left foot. |
| Enhances concentration and mental focus. | Lift your right foot and place it on your inner left thigh or calf. |
“Tree pose teaches us to stand tall and rooted, just like a tree. It helps us find balance both on and off the mat.”
So, next time you want to improve your balance and concentration, try Tree Pose (Vrksasana). You’ll feel grounded, centered, and connected to the present moment.
Bridge Pose (Setu Bandha Sarvangasana)
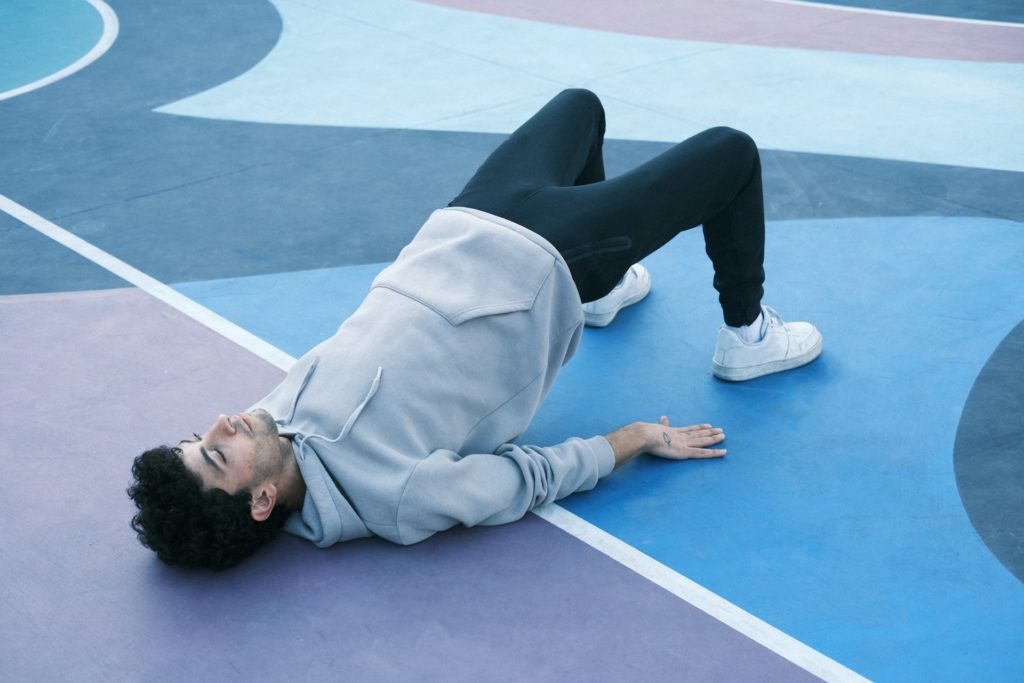
To practice the Bridge Pose, lie on your back with your knees bent and your feet flat on the floor. Ensure that your feet are hip-width apart and parallel to each other.
Press firmly through your feet as you lift your hips above the ground, engaging your glutes and thighs. Aim to create a straight line from your shoulders to your knees, avoiding excessive arching in the lower back.
To enhance stability and support, you can interlace your fingers underneath your body and press your arms into the floor. This technique will help you lift your chest and open your shoulders further.
The Bridge Pose improves posture, reduces anxiety, and promotes digestion. It stimulates the thyroid and abdominal organs, enhancing metabolism and promoting overall well-being.
As you hold the Bridge Pose, focus on maintaining steady and even breaths. Allow your body to settle into the pose and release any tension or resistance you may be experiencing.
When you are ready to release, slowly lower your hips back to the ground and return to a neutral position. Take a moment to observe the pose’s effects on your body and mind.
Practice the Bridge Pose regularly to experience its transformative benefits. As you deepen your practice, you may gradually increase the duration of the pose or explore variations such as lifting one leg at a time or adding a shoulder opener with a block.
Bound Ankle Pose (Baddha Konasana)
Bound Ankle Pose, or Baddha Konasana, is a seated pose that stretches the inner thighs and groin while creating a calming effect. Sit on the floor with your knees bent and the soles of your feet together. Hold your ankles or hinge forward at the hips to deepen the stretch. You can also sit on the edge of a blanket for additional support. This pose improves hip flexibility and promotes relaxation.
Bound Ankle Pose, or Baddha Konasana, is a yoga pose that focuses on opening the hips. Baddha means bound, and Konasana means angle. This pose is often referred to as the Butterfly Pose due to the flapping motion of the legs, which is similar to a butterfly’s wings.
To perform Bound Ankle Pose:
- Start by sitting on the floor with your legs extended in front of you.
- Bend your knees and bring the soles of your feet together, allowing your knees to drop out to the sides.
- Hold onto your ankles with your hands, or use your palms to press down on your thighs gently for a deeper stretch.
- Sit up straight, lengthening your spine, and relax your shoulders.
- Take a deep breath as you feel the stretch in your inner thighs and groin.
- Stay in this pose for several breaths, gradually deepening the stretch if comfortable.
Bound Ankle Pose is an outstanding yoga pose for hip opening. It stretches the adductor muscles in the inner thighs and groin, helping alleviate hip tightness and improving flexibility. This pose also has a calming effect on the mind and body, making it an ideal choice for relaxation and meditation.
“Bound Ankle Pose provides a deep stretch to the inner thighs and groin, releasing tension and stiffness in these areas. It’s a wonderful pose for hip opening and relaxation.”
As with any yoga pose, listening to your body and modifying it as needed is essential. If you experience discomfort or pain, use props such as blankets or blocks to support your knees or sit on an elevated surface for added comfort.
Practice Bound Ankle Pose regularly to improve hip flexibility, relieve tension, and promote relaxation. It can be incorporated into your yoga routine or a standalone pose whenever you need a moment of calm and release in your hips.
Seated Forward Fold (Paschimottanasana)
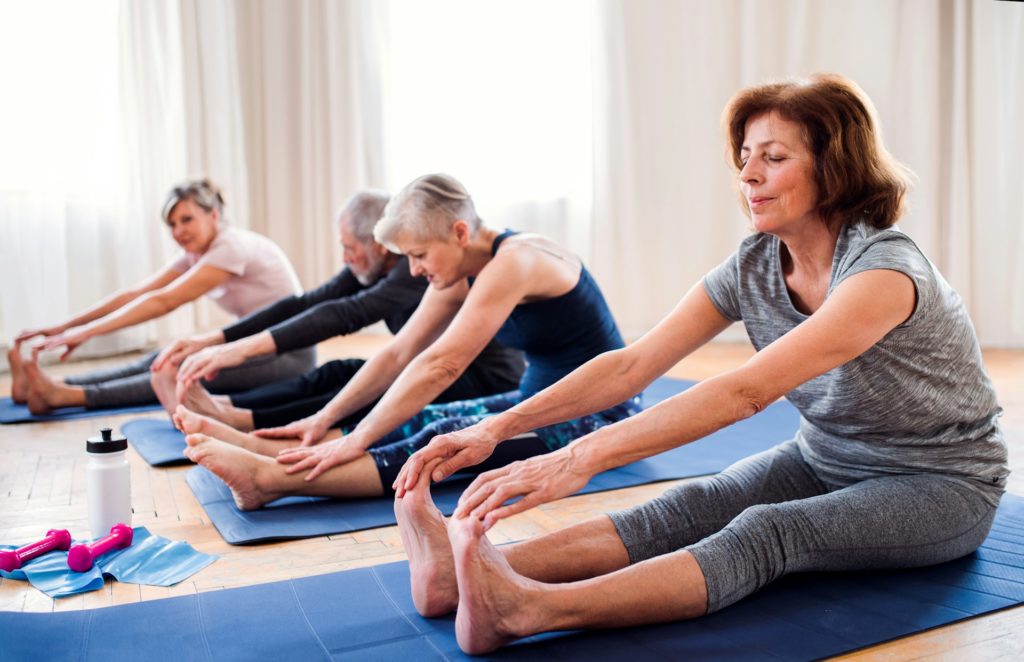
To practice Seated Forward Fold:
- Sit on the floor with your legs extended in front of you.
- Ensure that your spine is upright and your sit bones are grounded.
- Take a deep breath in and lengthen your spine.
- As you exhale, hinge forward from your hips, not your lower back.
- Reach your arms forward and try to hold onto the outer edges of your feet.
- If you cannot reach your feet, you can use a strap around the soles of your feet or hold onto your ankles.
- Relax your neck and shoulders as you fold further into the stretch.
- Hold the pose for a few breaths, focusing on lengthening your spine and relaxing into the stretch.
Seated Forward Fold is an excellent posture for relieving tension in the back, improving digestion, and calming the mind. Its gentle stretch to the hamstrings can help improve leg flexibility over time. It is also an excellent pose for relieving stress and anxiety.
Remember to listen to your body when practicing the Seated Forward Fold. If you feel discomfort or pain, slowly ease out of the pose and modify it to suit your needs. Always work within your limits and be patient with your progress.
Benefits of Seated Forward Fold:
| Benefits | Description |
|---|---|
| Hamstring Stretching. | Lengthens and stretches the hamstrings, promoting flexibility and preventing tightness. |
| Spine Stretching. | It helps lengthen and strengthen the spine, improving posture and alleviating back pain. |
| Shoulder Release. | It opens and releases shoulder tension, relieving tightness and improving mobility. |
| Calming Effect. | Calms the mind and nervous system, reducing stress, anxiety, and fatigue. |
Corpse Pose (Savasana)
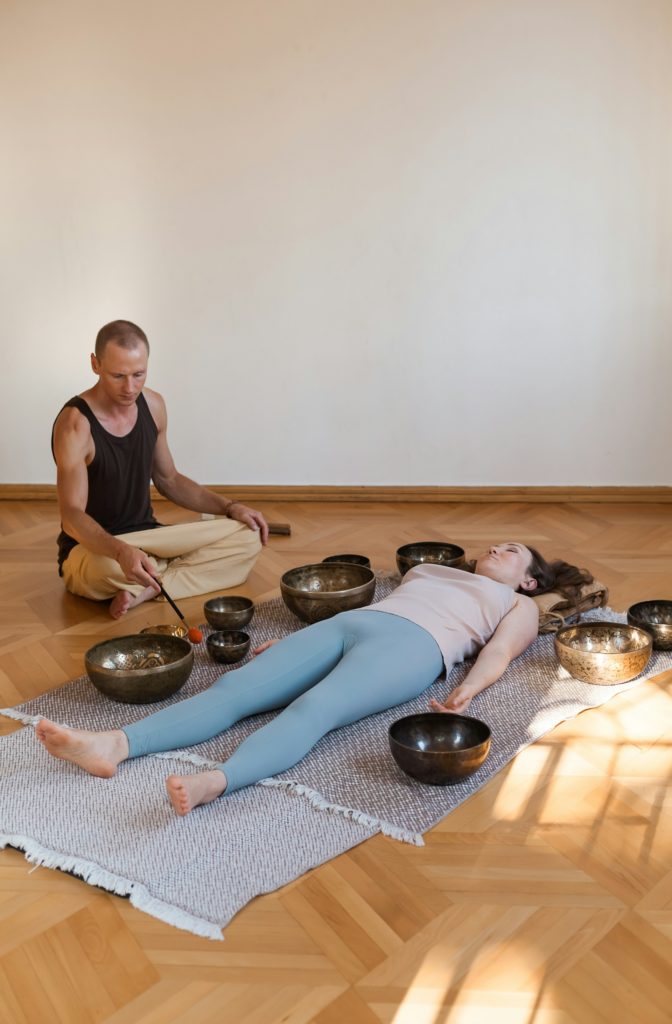
Corpse Pose, or Savasana, is a yoga pose for deep relaxation and stress relief. As the final pose in a yoga practice, Savasana allows you to fully absorb the benefits of your training and achieve a state of complete relaxation.
To perform Savasana, lie on your back with your arms by your sides, palms facing up, and your legs extended. Please close your eyes and consciously release any tension from your body, allowing it to sink onto the floor.
This pose promotes deep relaxation by calming the nervous system and reducing anxiety. It also enhances the mind-body connection, allowing you to integrate the physical and mental benefits of your practice fully.
By practicing Savasana regularly, you can cultivate a sense of inner peace and rejuvenation. It is an essential pose for finding balance in our fast-paced and stressful lives.
Applying Savasana at the end of your yoga practice can help you experience deep relaxation and tranquility.
Yoga Poses with Names and Pictures – Conclusion
In conclusion, this ultimate guide provides a comprehensive list of yoga poses with names and pictures to help beginners and experienced practitioners enhance their yoga practice. Each pose offers unique mental and body benefits, including improved strength, flexibility, balance, and relaxation. By practicing these poses with proper alignment and mindfulness, you can achieve a more profound yoga journey and experience the transformative power of yoga in your life.
Useful Links
FAQ-Yoga Poses with Names and Pictures
What are some popular yoga poses and their names?
Some popular yoga poses and their names include Mountain Pose (Tadasana), Chair Pose (Utkatasana), Downward-Facing Dog (Adho Mukha Svanasana), Warrior II (Virabhadrasana II), Triangle Pose (Trikonasana), Tree Pose (Vrksasana), Bridge Pose (Setu Bandha Sarvangasana), Bound Ankle Pose (Baddha Konasana), Seated Forward Fold (Paschimottanasana), and Corpse Pose (Savasana).
What are the benefits of practicing yoga?
Practicing yoga offers numerous benefits, including improved flexibility, balance, strength, and posture. It also helps reduce stress and anxiety, enhances mental focus and concentration, promotes relaxation and better sleep, boosts immune function, and increases overall well-being.
Can beginners do yoga poses?
Yes, beginners can do yoga poses. It’s essential to start with beginner-friendly poses and gradually progress as you build strength and flexibility. Attending beginner’s yoga classes or seeking guidance from a qualified yoga instructor is recommended to ensure proper alignment and technique.
How long should I hold each yoga pose?
The duration of each yoga pose depends on your comfort level and experience. Aim to hold each pose for 5 to 10 breaths as a general guideline. However, if you’re a beginner, you can start with holding poses for shorter durations and gradually increase the duration as you become more comfortable and experienced.
Can yoga pose help with stress relief?
Yes, yoga poses can help with stress relief. The combination of gentle movements, deep breathing, and mindfulness in yoga helps activate the relaxation response, reduce the production of stress hormones, and promote a sense of calmness and relaxation in the mind and body.
Page Contents
Toggle